May 05, 2023 · 25 mins read
Clustering - Run Multiple Instances of Node.js Application
Improving Node.js Application Performance With ClusteringUmakant Vashishtha

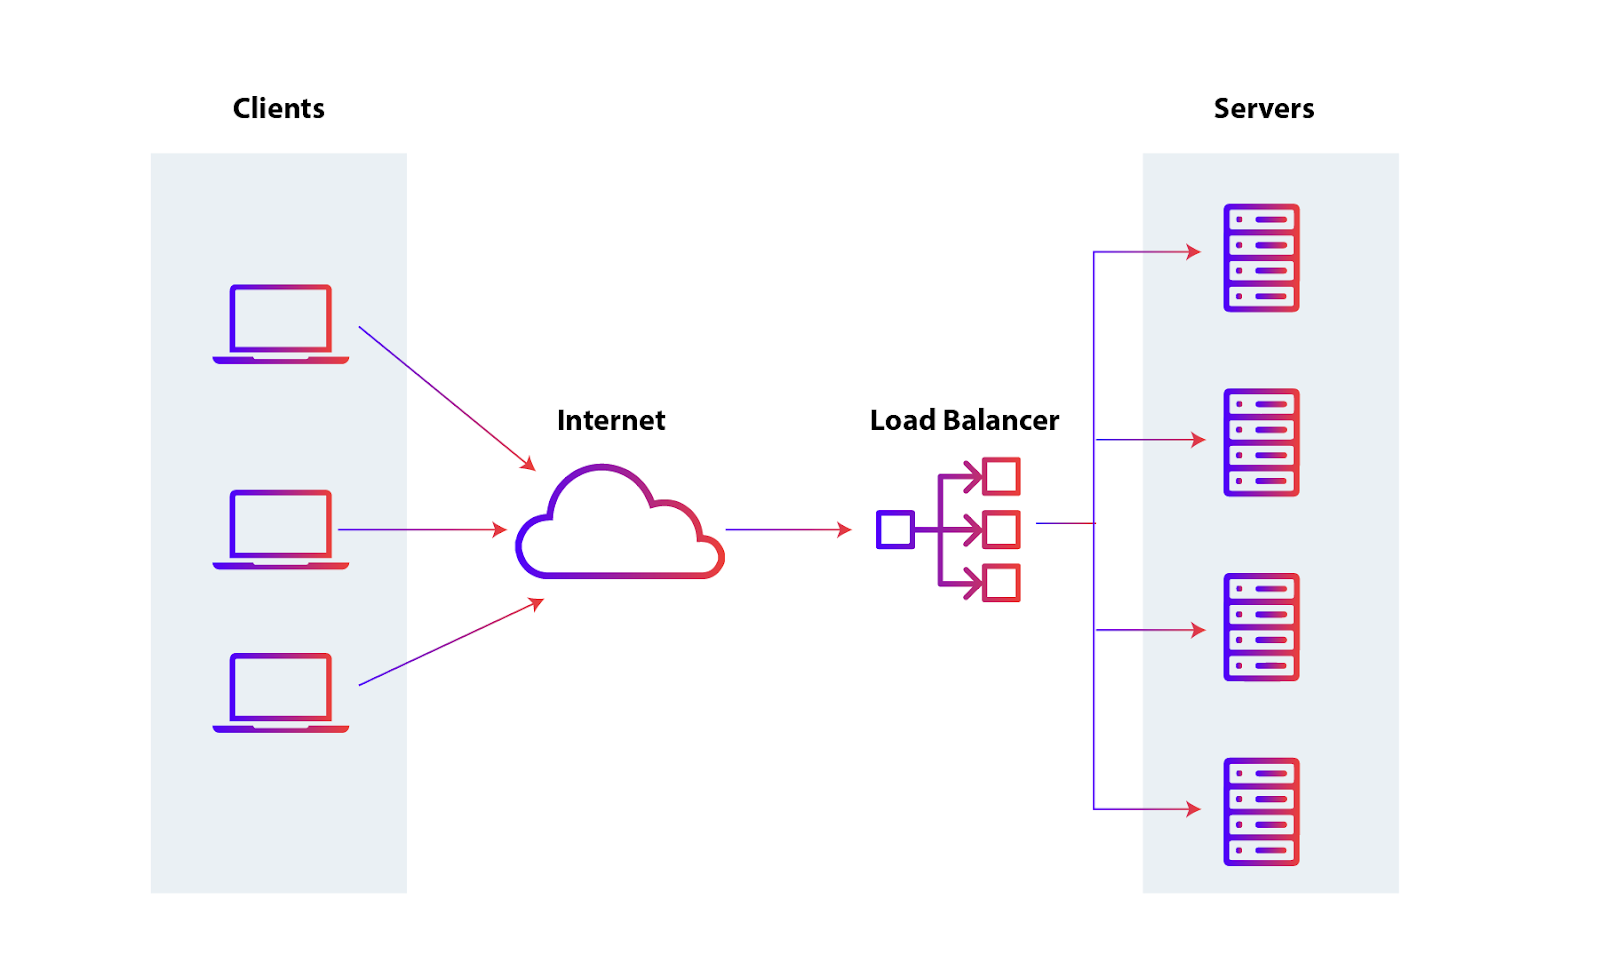
Load Balancing with Clusters
Introduction
Most computers these days have multiple CPU cores. Each CPU core provides our machine some bandwidth to perform tasks/operations. More the number of CPU cores, more the tasks/operations a computer can perform at the same time.
When we build Node.js applications, we run them as a single process. A single Node.js process always uses a single CPU core, and it is limited to the number of operations it can perform.
Let’s take an example of a Node.js program that performs a large number of operations.
A non-optimal approach to calculate fibonacci numbersfunction fibonacciRecursive(n) {
  if (n < 3) {
    return 1;
  }
  return fibonacciRecursive(n - 1) + fibonacciRecursive(n - 2);
}

let fib40 = fibonacciRecursive(40);
If you execute this code with Node.js, you will have to wait 10-15 seconds (depending on your machine) to see the output.
And while the CPU is busy calculating fibonacciRecursive(40), you will not be able to calculate any other fibonacci number at this time.
The above is an example of a CPU intensive process, analogous to some Node.js program that processes large amount of data.
Introduction to Clustering

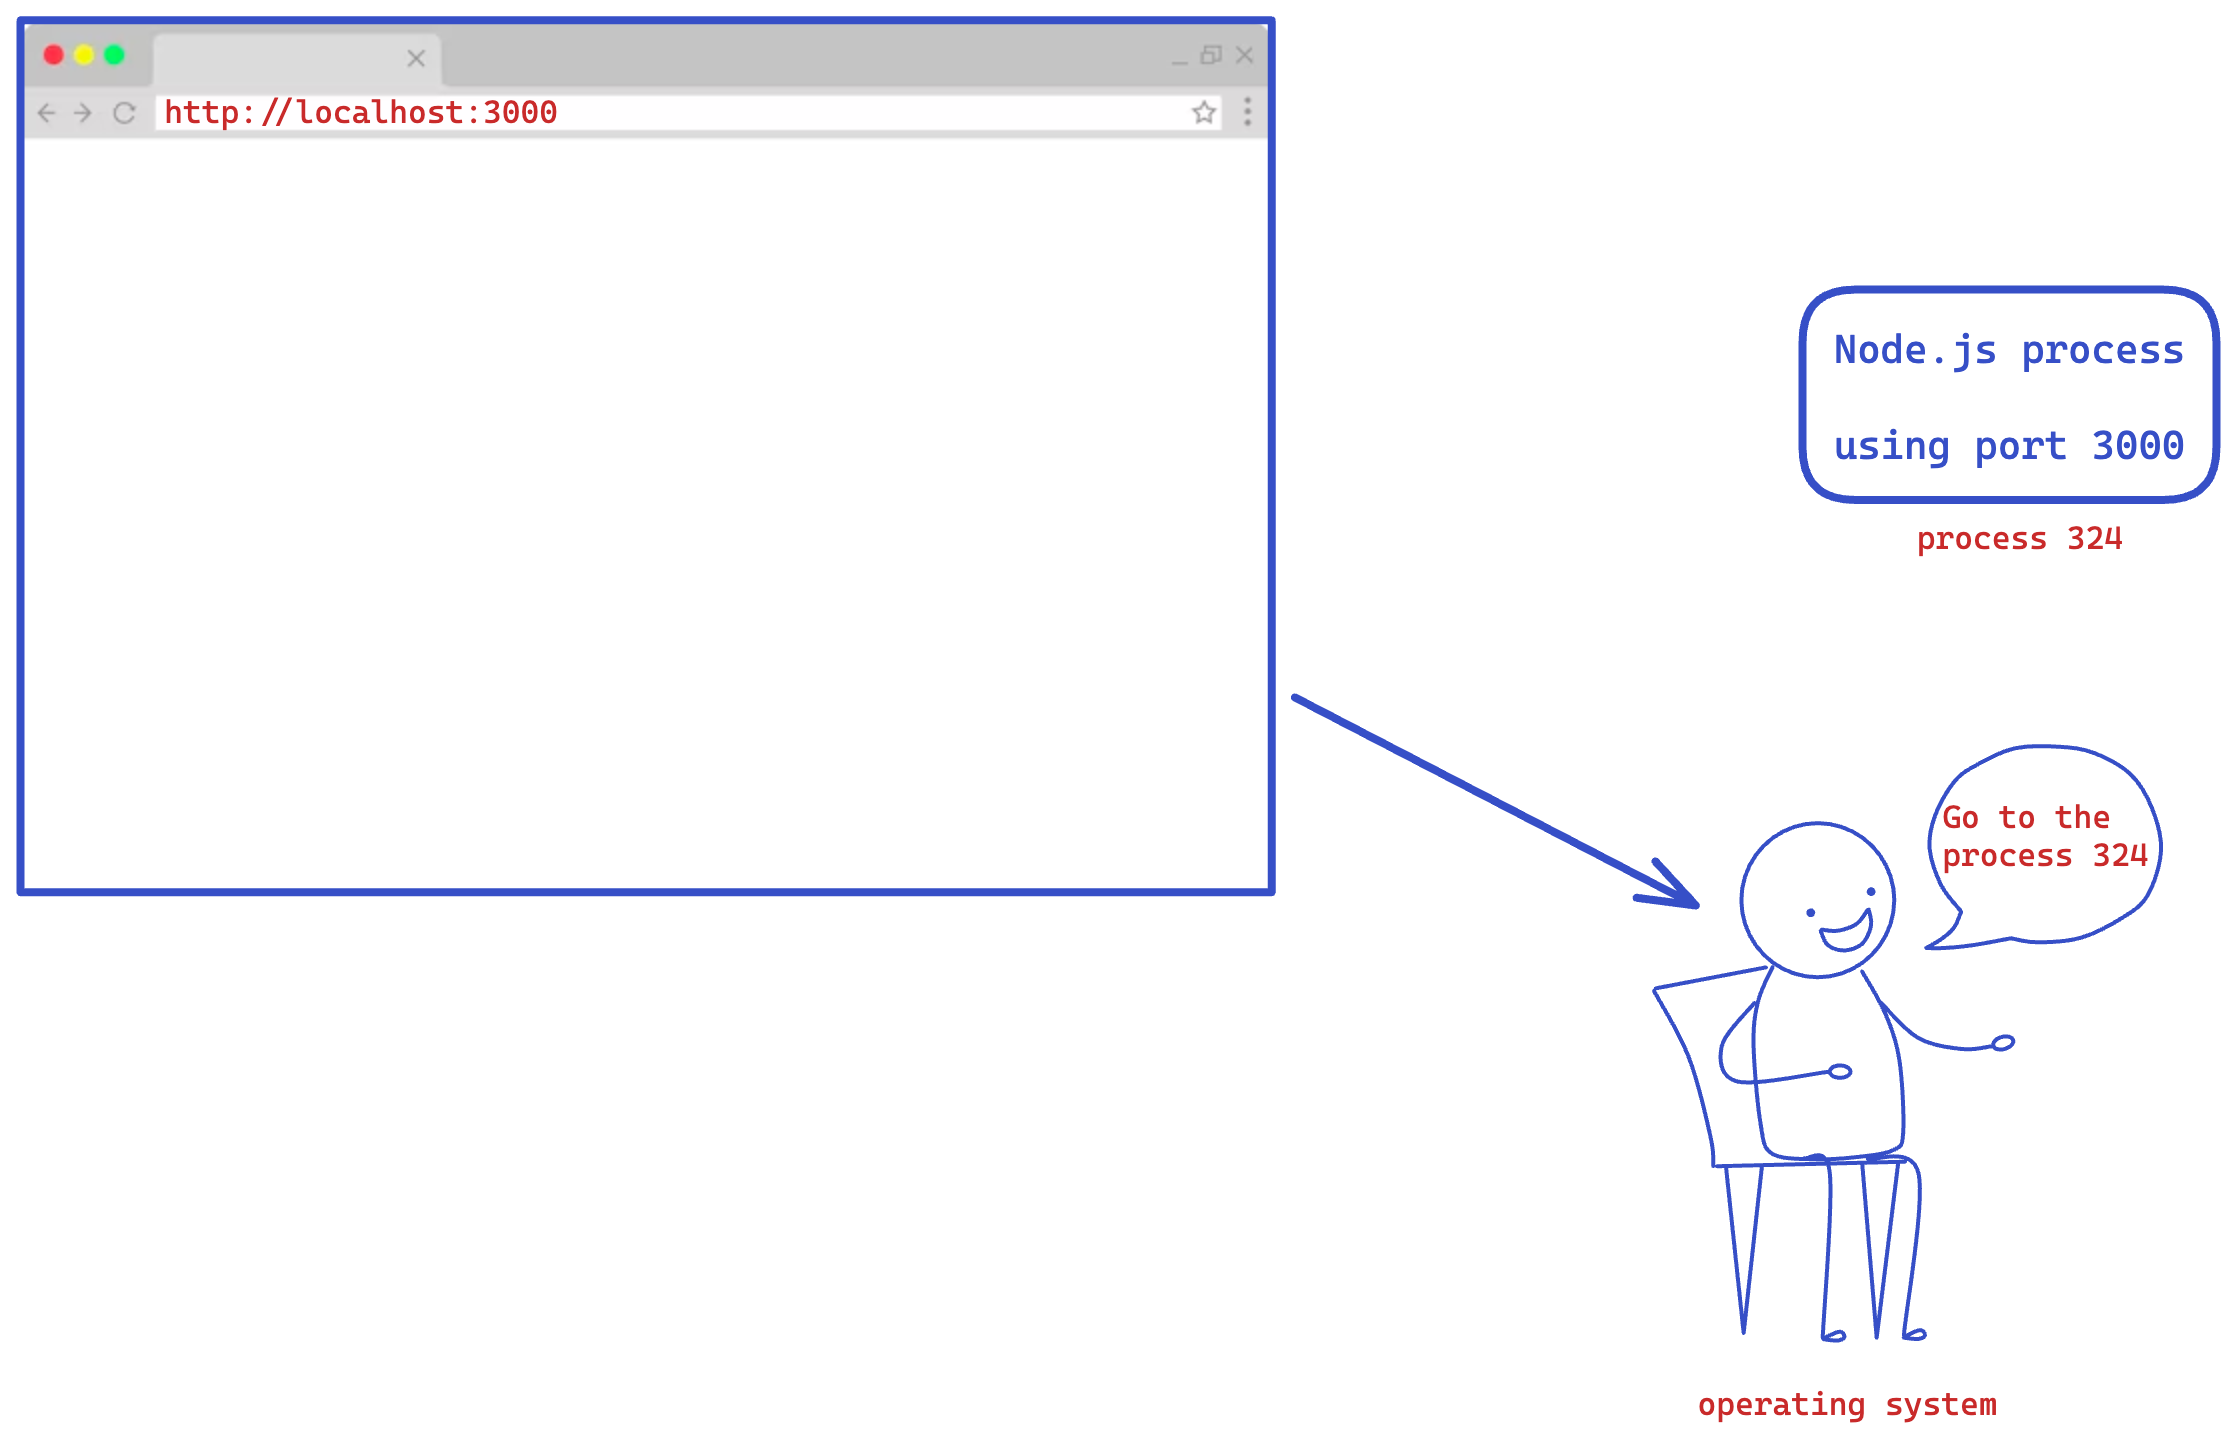
A simple Node.js http server listens for http requests on a specified port. Any incoming request to that port will be redirected to the Node.js process.
Most requests are implemented in a way that it does not take high cpu usage, rather perform some activities like:
- Read some data from database
- Do some validation
- Send a network call to some other service
- Update data into the database
- Prepare and send the response
Most of these activities are I/O operations and Node.js event loop will allow multiple requests to do all of this at the same time.
But sometimes we have to write code that is CPU intensive, instead of just I/O operations. For example, given an image, convert it into another format. Long-running operations like these are blocking for other requests.
If you have a lot of requests like these, many of them will have to wait in line for the previous one to finish. In cases like this, it would help us to have multiple instances of our application and use something like a Load Balancer to distribute requests in round-robin mechanism. This is a techique for horizontal scaling.

This is where Clustering comes into picture. Node.js supports replicating your application into multiple processes internally without any additional effort.
Now let’s take a look at the implementation.
First we will implement and benchmark without the clusters. After that, we will use Node.js clusters and see if that improves the performance.
Without Clusters
First let’s see an application processing CPU intensive requests with a single instance.
Below is a simple express app that listens on port 3000 for such requests.
import express from "express";
const app = express();
const port = 3000;

app.get("/", (req, res) => {
  res.send("Hello World!");
});

app.get("/api/fib/:num", function (req, res) {
  let n = parseInt(req.params.num);

  if (n > 45) {
    res.status(500).send("Noo, this will break the server");
  }

  let result = fib(n);

  res.send(`Fibonacci Number is ${result}`);
});

// O(2^n)
function fib(n) {
  if (n < 3) {
    return 1;
  }
  return fib(n - 1) + fib(n - 2);
}

app.listen(port, () => {
  console.log(`Send requests to http://localhost:${port}`);
});
To experience the blocking behaviour of this endpoint, try to send requests to http://localhost:3000/api/fib/40 from 3 different tabs simultaneously.

This brings down the throughput of our server, which is measured in requests/second.
We can also test the throughput using the nice npm package autocannon by using the command as below.
$ npx autocannon http://localhost:3000/api/fib/40

Running 10s test @ http://localhost:3000/api/fib/40
10 connections


┌─────────┬────────┬─────────┬─────────┬─────────┬────────────┬────────────┬─────────┐
│ Stat    │ 2.5%   │ 50%     │ 97.5%   │ 99%     │ Avg        │ Stdev      │ Max     │
├─────────┼────────┼─────────┼─────────┼─────────┼────────────┼────────────┼─────────┤
│ Latency │ 661 ms │ 4923 ms │ 6142 ms │ 6142 ms │ 4410.44 ms │ 1899.49 ms │ 6142 ms │
└─────────┴────────┴─────────┴─────────┴─────────┴────────────┴────────────┴─────────┘
┌───────────┬───────┬───────┬───────┬───────┬───────┬───────┬───────┐
│ Stat      │ 1%    │ 2.5%  │ 50%   │ 97.5% │ Avg   │ Stdev │ Min   │
├───────────┼───────┼───────┼───────┼───────┼───────┼───────┼───────┤
│ Req/Sec   │ 1     │ 1     │ 2     │ 2     │ 1.6   │ 0.49  │ 1     │
├───────────┼───────┼───────┼───────┼───────┼───────┼───────┼───────┤
│ Bytes/Sec │ 267 B │ 267 B │ 534 B │ 534 B │ 427 B │ 131 B │ 267 B │
└───────────┴───────┴───────┴───────┴───────┴───────┴───────┴───────┘

Req/Bytes counts sampled once per second.
# of samples: 10

26 requests in 10.02s, 4.27 kB read
With Clusters
Now, let’s use the cluster module in the app to spawn some child processes and see how that improves the throughput, and in turn it will also reduce the response time for parallel requests. If the machine has 4 CPU cores, then we can use clustering to spawn 4 instances of our application.
With cluster module, we will be spawning up several child processes that will all share the TCP connection on the port 3000 and they will be able to handle requests sent to that port.
Here is the code, with explanation down below.
import express from "express";
import cluster from "cluster";
import { cpus } from "os";
import { pid } from "process";
const app = express();
const port = 3000;

// O(2^n)
function fib(n) {
  if (n < 3) {
    return 1;
  }
  return fib(n - 1) + fib(n - 2);
}

if (cluster.isPrimary) {
  console.log(`Primary ${pid} is running`);

  // Fork workers.
  for (let i = 0; i < cpus().length; i++) {
    cluster.fork();
  }

  cluster.on("exit", (worker) => {
    console.log(`worker ${worker.process.pid} died`);
  });
} else {
  // Workers can share any TCP connection
  // In this case it is an HTTP server
  app.get("/", (req, res) => {
    res.send("Hello World!");
  });

  app.get("/api/fib/:num", function (req, res) {
    let n = parseInt(req.params.num);

    if (n > 45) {
      res.status(500).send("Noo, this will break the server");
    }

    let result = fib(n);

    res.send(`Fibonacci Number is ${result}`);
  });

  app.listen(port, () => {
    console.log(`Send requests to http://localhost:${port}`);
  });

  console.log(`Worker ${pid} started`);
}
The worker processes are spawned using the child_process.fork() method. The method returns a ChildProcess object that has a built-in communication channel which allows messages to be passed back and forth between the child and its parent. The workers are created and managed by the master process. When the app first runs, we check to see if it’s a master process with isPrimary.
When we run the app, we see the following output. Each worker has its own process id and they use different resources like memory and .
Primary 94879 is running
Worker 94881 started
Send requests to http://localhost:3000
Worker 94883 started
Send requests to http://localhost:3000
Worker 94882 started
Send requests to http://localhost:3000
Worker 94884 started
Send requests to http://localhost:3000
Worker 94887 started
Send requests to http://localhost:3000
Worker 94885 started
Send requests to http://localhost:3000
Worker 94886 started
Send requests to http://localhost:3000
Worker 94888 started
Send requests to http://localhost:3000
Incoming connections are distributed among child processes in one of two ways:
- The master process listens for connections on a port and distributes them across the workers in a round-robin manner. This is the default approach on all platforms, except Windows.
- The master process creates a listen socket and sends it to interested workers that will then be able to accept incoming connections directly.
Now let’s benchmark this server with clusters
Running 10s test @ http://localhost:3000/api/fib/40
10 connections


┌─────────┬────────┬────────┬─────────┬─────────┬───────────┬───────────┬─────────┐
│ Stat    │ 2.5%   │ 50%    │ 97.5%   │ 99%     │ Avg       │ Stdev     │ Max     │
├─────────┼────────┼────────┼─────────┼─────────┼───────────┼───────────┼─────────┤
│ Latency │ 719 ms │ 795 ms │ 2314 ms │ 2509 ms │ 975.99 ms │ 401.17 ms │ 2509 ms │
└─────────┴────────┴────────┴─────────┴─────────┴───────────┴───────────┴─────────┘
┌───────────┬─────────┬─────────┬─────────┬─────────┬─────────┬───────┬─────────┐
│ Stat      │ 1%      │ 2.5%    │ 50%     │ 97.5%   │ Avg     │ Stdev │ Min     │
├───────────┼─────────┼─────────┼─────────┼─────────┼─────────┼───────┼─────────┤
│ Req/Sec   │ 8       │ 8       │ 8       │ 15      │ 9.6     │ 2.54  │ 8       │
├───────────┼─────────┼─────────┼─────────┼─────────┼─────────┼───────┼─────────┤
│ Bytes/Sec │ 2.06 kB │ 2.06 kB │ 2.06 kB │ 3.85 kB │ 2.47 kB │ 652 B │ 2.06 kB │
└───────────┴─────────┴─────────┴─────────┴─────────┴─────────┴───────┴─────────┘

Req/Bytes counts sampled once per second.
# of samples: 10

106 requests in 10.03s, 24.7 kB read
Let’s compare the results for different requests with different modes.
Without Clusters

┌──────────────┬───────────────────┬───────────────────┐
│ Request      │ Req/Sec (Avg)     │ Latency (Avg)     │
├──────────────┼───────────────────┼───────────────────┤
│ /api/fib/30  │ 192               │ 51 ms             │
├──────────────┼───────────────────┼───────────────────┤
│ /api/fib/35  │ 18                │ 541 ms            │
├──────────────┼───────────────────┼───────────────────┤
│ /api/fib/40  │ 1.6               │ 4000 ms           │
└──────────────┴───────────────────┴───────────────────┘

With Clusters

┌──────────────┬───────────────────┬───────────────────┐
│ Request      │ Req/Sec (Avg)     │ Latency (Avg)     │
├──────────────┼───────────────────┼───────────────────┤
│ /api/fib/30  │ 1191              │ 8 ms              │
├──────────────┼───────────────────┼───────────────────┤
│ /api/fib/35  │ 114               │ 87 ms             │
├──────────────┼───────────────────┼───────────────────┤
│ /api/fib/40  │ 9.8               │ 960 ms            │
└──────────────┴───────────────────┴───────────────────┘
Clearly, we roughly have a factor of 10 in throughput and a large difference in latency as well. We have a clear winner here.
So this is how you can improve the performance of your node.js application.
Hope you learned something useful from this post. Please leave your feedback in the comments.
Similar Articles

Buffered vs Streaming Data Transfer
Comparing buffered and streaming data transfer in Node.js server
Oct 27, 2023 · 15 mins

Using Signed URLs in React | File Upload using AWS S3, Node.js and React - Part 3
Building the react application to upload files directly to AWS S3 using Signed URLs generated from our node.js application.
Oct 15, 2023 · 15 mins

Setting Up Node.js App | File Upload using AWS S3, Node.js and React - Part 2
Setting up Node.js application and use AWS SDK to generate S3 Signed URL using AWS access credentials that will be used in our react application to upload files directly.
Oct 07, 2023 · 20 mins
